When teachers create their own classroom materials, the visual layout is just as important as the lesson content. For students with dyslexia, standard text can look crowded, blurry, or jumbled. Letters might appear to flip, swap places, or merge together, making reading exhausting.
Choosing the top-rated fonts for crafting teacher-made dyslexic resources matters because the right typeface reduces cognitive load. It stabilizes the text on the page, allowing the student to focus on comprehending the lesson rather than struggling to decode the words. Accessible classroom materials start with simple, intentional design choices.
Which fonts actually help students with dyslexia read easier?
The most effective typefaces for special education are usually sans-serif, meaning they lack the small decorative lines at the ends of strokes. These clean lines prevent visual clutter.
Arial and Verdana are excellent standard choices. They are widely available on school computers, feature generous spacing between letters, and have distinct character shapes that prevent confusion.
OpenDyslexic is a specialized option designed specifically for this learning difference. It features heavier bottom lines on the letters, which creates a visual anchor and helps prevent characters from appearing to flip upside down.
Comic Sans is also surprisingly effective. While some designers dislike its casual look, its irregular letter shapes make each character highly distinct, which is exactly what a dyslexic reader needs. When looking for the right typeface, it helps to review a breakdown of the most readable typefaces for student worksheets to see how they perform in real classroom settings.
Why do some standard classroom fonts cause reading struggles?
Serif fonts like Times New Roman or Garamond have extra strokes and flourishes. For a dyslexic reader, these tiny details create visual noise. The extra lines can make letters blur into one another, especially when printed in smaller sizes.
Many standard fonts also suffer from poor character distinction. If the lowercase b and d are exact mirror images of each other, or if the p and q look identical when flipped, the student has to spend extra mental energy figuring out which letter is which. Good dyslexia-friendly typefaces give these commonly confused letters unique shapes or distinct tail lengths.
How should teachers format their worksheets beyond just picking a font?
Font choice is only half the battle. The way you arrange the text on the page dictates how easily a student can track the words with their eyes.
Always left-align your text. This gives the reader a consistent starting point for every new line. You should also increase your line spacing to at least 1.5. This prevents the descenders (the tails on letters like g, y, and p) from crashing into the ascenders (the tall parts of letters like h, t, and l) on the line below. Applying proper typography rules to your educational materials ensures the layout supports the text rather than fighting against it.
What are the most common mistakes teachers make with accessible text?
Even with a great font, a few formatting habits can ruin the readability of a worksheet. The most common mistakes include:
- Using italics for emphasis: Slanting the letters makes them look jagged and harder to read. Use bold text instead to highlight key vocabulary.
- Writing in all caps: We recognize words partly by their overall shape. Capitalizing every letter turns words into uniform blocks, forcing the student to read letter-by-letter.
- Justifying text: Aligning text to both the left and right margins creates uneven gaps between words. These gaps form distracting "rivers" of white space that pull the reader's eye off the line.
- Using harsh contrast: Pure black text on bright white paper can cause glare and visual stress. Dark grey text on an off-white or pale cream background is much gentler on the eyes.
Many educators find it useful to follow a step-by-step selection process for worksheet fonts to avoid these typical formatting traps before sending assignments home.
How can you test if your custom worksheet is truly readable?
The best way to test your materials is to step away from your computer screen. Print a physical copy of your worksheet and hold it at arm's length. If the text looks like a dense, dark block, you need to add more white space, increase the font size, or break the text into smaller paragraphs with clear headings.
You can also ask a student for direct feedback. Hand them the worksheet and ask if the words feel too squished or if the background is too bright. Their physical reaction to the page will tell you if your adjustments are working.
Next time you open your word processor to build a reading passage or math worksheet, run through this quick setup checklist:
- Set the font to Arial, Verdana, or Comic Sans at 12pt to 14pt size.
- Change the font color from pure black to dark grey (like hex #333333).
- Change the page background from stark white to a soft cream or pale yellow.
- Set line spacing to 1.5 and ensure the text is strictly left-aligned.
- Remove all italics and underlining, replacing them with bold text for emphasis.
- Break long paragraphs into shorter chunks of three to four sentences.
 Best Fonts for Dyslexia-Friendly Worksheets
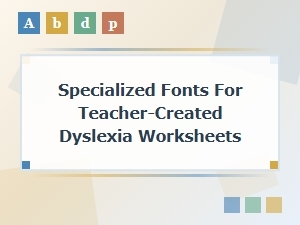 Choosing Dyslexia-Friendly Fonts for Your Worksheets
 Selecting Dyslexia-Friendly Fonts for Classroom Worksheets
 Designing Readable Fonts for Dyslexia Learning Tools
 Choosing the Right Fonts for Dyslexic Learners
 Choosing Legible Fonts for Student Worksheets